San Francisco is known for many things. The Golden Gate Bridge, the cable car, the winding Lombard Street, Rice-A-Roni, and of course, sourdough bread.
So when I was trying my hand at creating Dutch Crunch Bread, I thought it was the right thing to use a sourdough starter. Besides, once again my starter is starting to accumulate in my fridge, taking up precious space.
What is Dutch Crunch Bread?
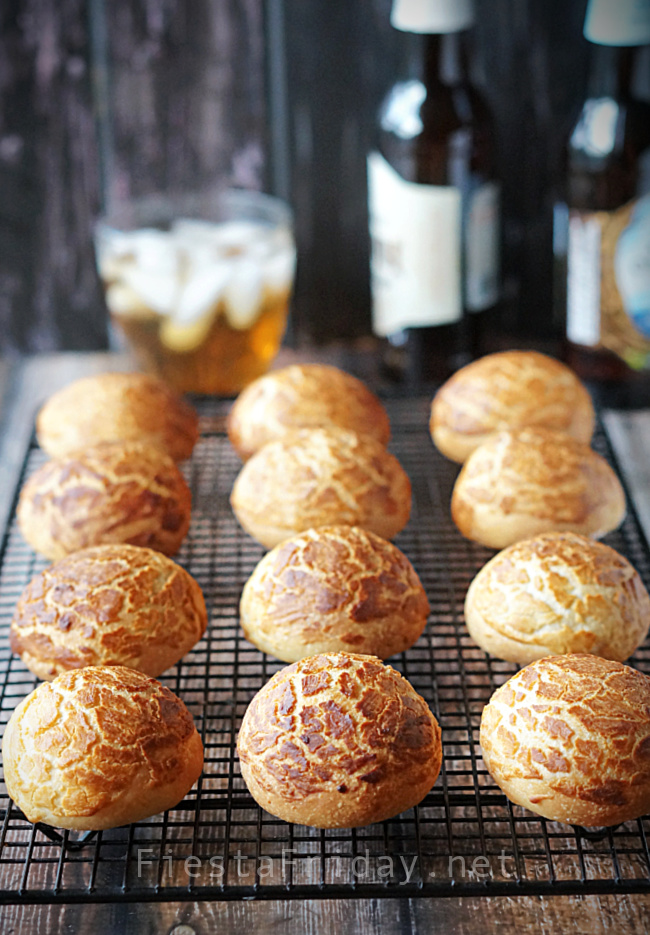
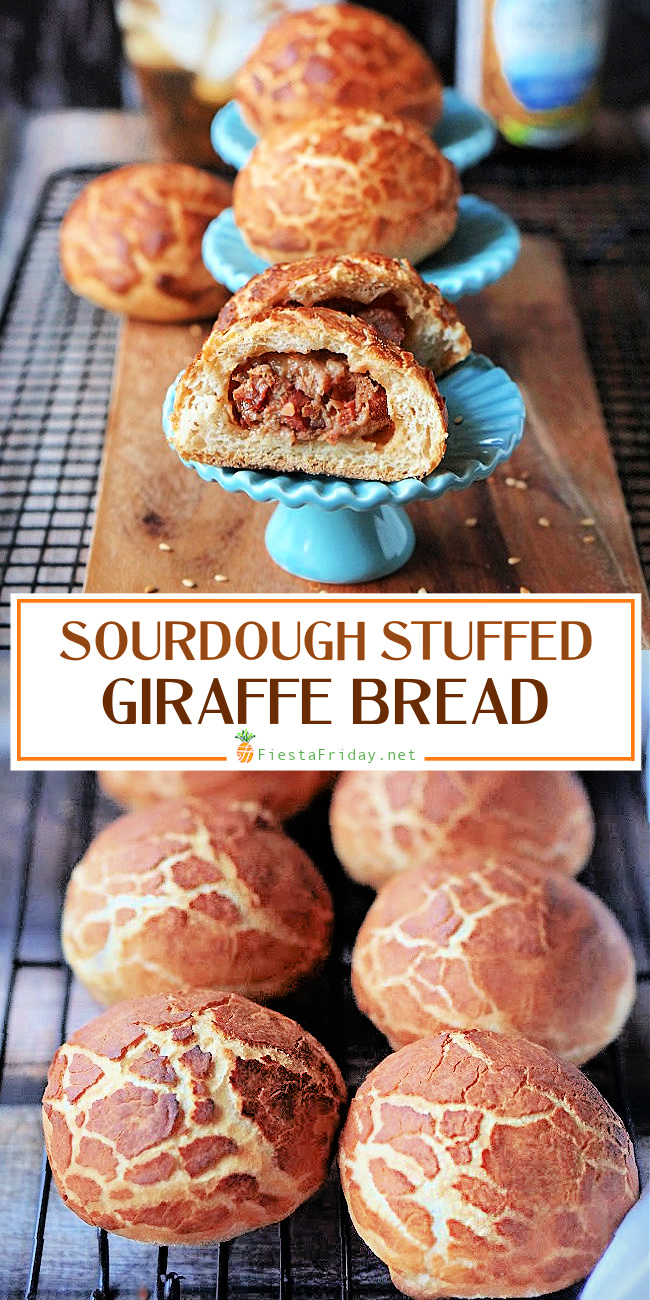
Dutch Crunch Bread is a type of bread popular in the Bay Area and is so named because of its Dutch origin and its signature crunchy and crackly coating.
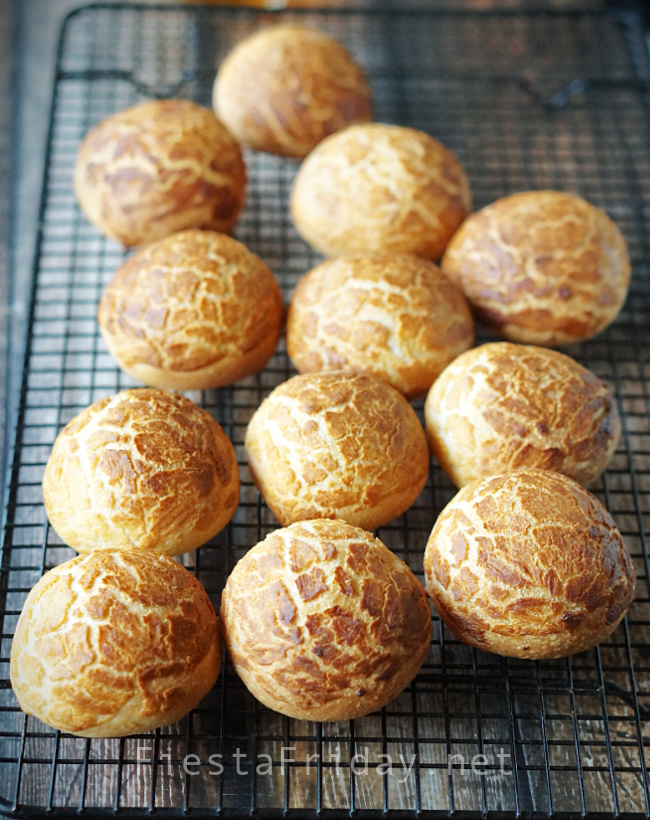
Dutch Crunch Bread is also known by many other names. In the Netherlands, where it originates, it’s called Tijgerbrood (Tiger bread) or Tijgerbol (Tiger roll).
The US supermarket chain Wegmans calls it Marco Polo Bread, and at one time even offered the bagel version in their store bakery.
In England, a little girl wrote a letter to the Sainsbury’s supermarket chain to have the bread renamed Giraffe Bread, and Sainsbury’s agreed.
I, too, agree! That little girl is so perceptive! That’s the most appropriate name for this bread. The crunchy pattern on top of the bread does look distinctively giraffe-like.
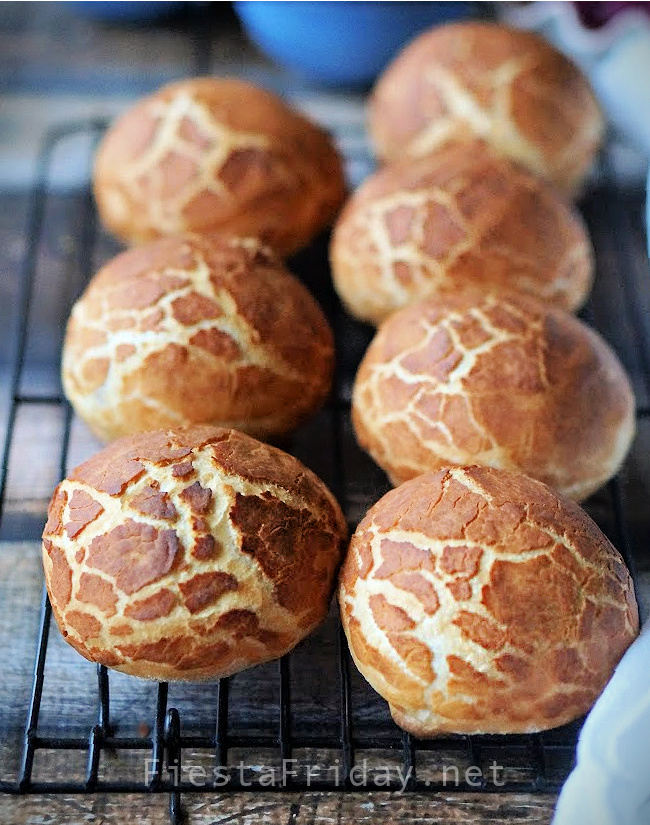
In the future, I think I’ll refer to this Dutch Crunch Bread as Giraffe Bread instead.
Besides, I love giraffes. Did you know giraffes only sleep for several minutes every few hours? I learned that from reading a book to second graders!
Here I go, going off on a tangent again. We’re not talking about giraffe the animal, but giraffe the bread.
What Makes the Crunch?
The crunchy topping on the bread is achieved by applying a paste made essentially with rice flour, water, yeast, and oil. Salt and sugar may be included to add flavor.
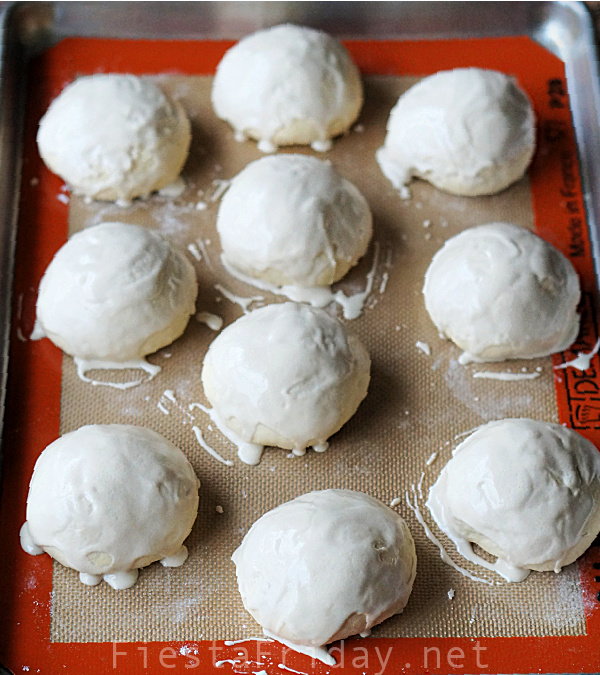
The paste is applied just prior to baking, and as the bread bakes and expands, the paste crackles and becomes crispy.
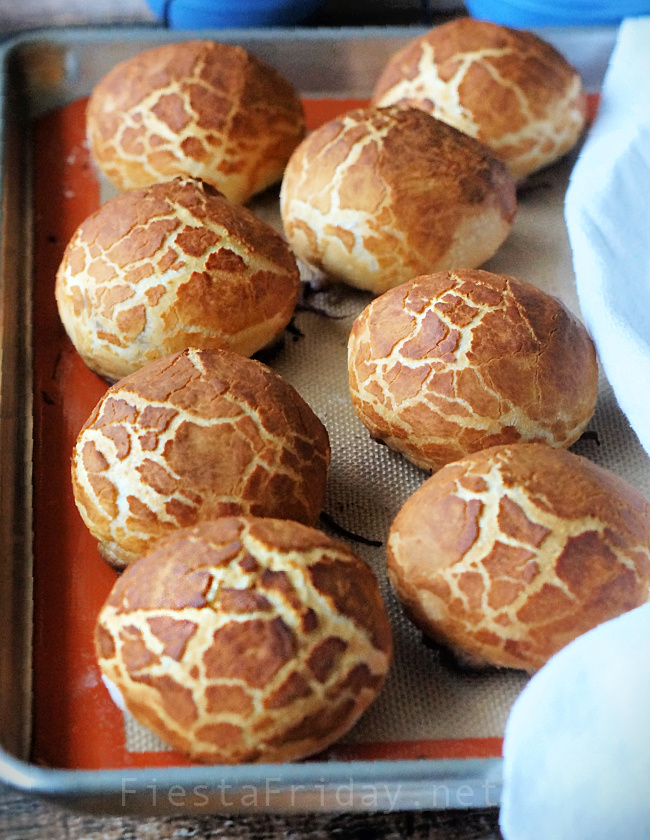
Do you have to use sourdough?
No, you don’t. Most recipes don’t call for sourdough starter. Yeast (dry active, instant, or fresh) can be used in place of the sourdough starter.
Besides the crunchy exterior, Dutch Crunch Bread is described by many as having a soft interior crumb that’s slightly sweet. Yeast, and an addition of sugar, will likely help achieve this. My sourdough version has a more robust crumb and is slightly chewy. But it’s not dense like a bagel or pretzel. It stands better at being stuffed than a soft-crumb bread would. It also has that slight tang of sourdough that makes it extra flavorful.
How To Serve Dutch Crunch Bread?
Now comes the fun part. On its own, this bread is already very tasty. The crunchy topping, and the fact that it’s also a sourdough make this bread very flavorful. No bland bread here. Warm from the oven, and maybe with just a little bit of butter, it makes a wonderful snack.
But, of course, you can always turn it into a slider. Nobody can resist a slider. Not one with a crunchy topping like this.
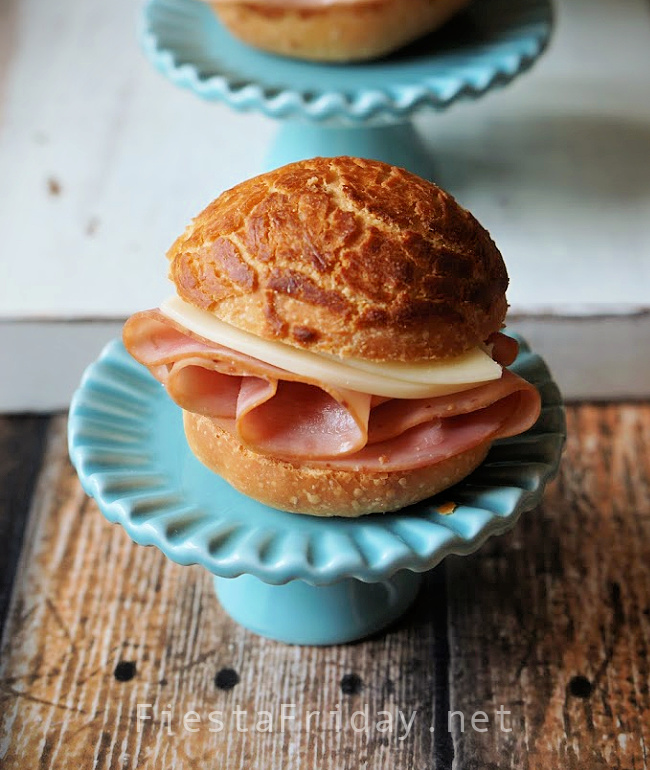
On the other hand, if you really want to make an impression, you stuff your Giraffe Bread.
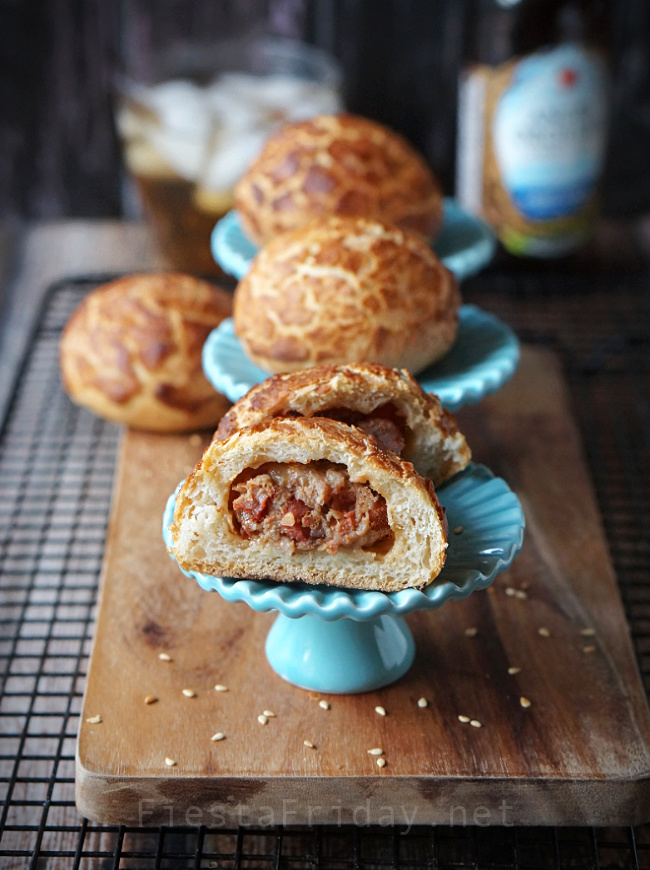
Remember when I made my Stuffed Meatballs in Guinness Gravy? Well, I had extra meatball mix and decided to stuff my dough with it. Boomshakalaka! As my son would say, lol.
But I save the best for last. Today is the day after St. Patrick’s Day, so what else is taking up residence in my fridge? Leftover corned beef, that’s what. Hello! Perfect for stuffing the dough!
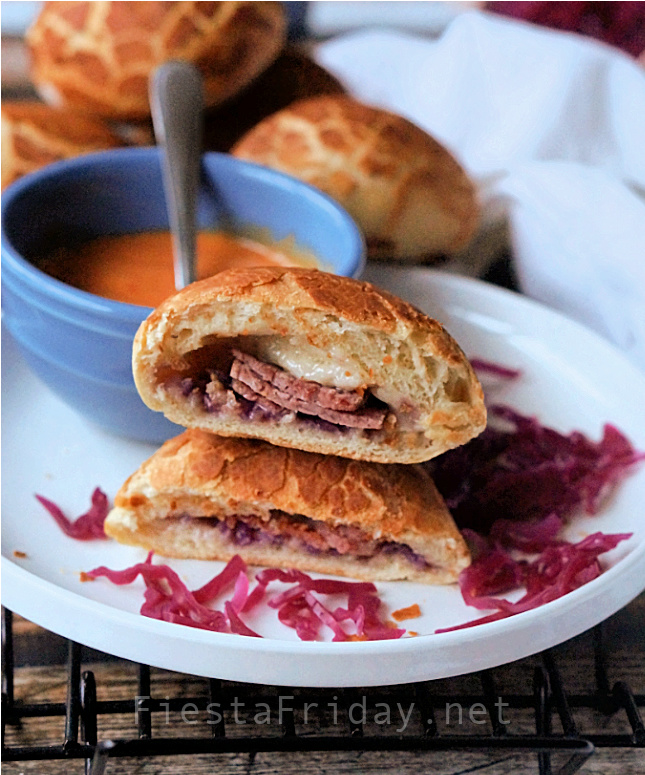
I also happened to have homemade purple cabbage sauerkraut on hand. And sliced cheese is always around. So, look, they found themselves stuffed inside the Giraffe!
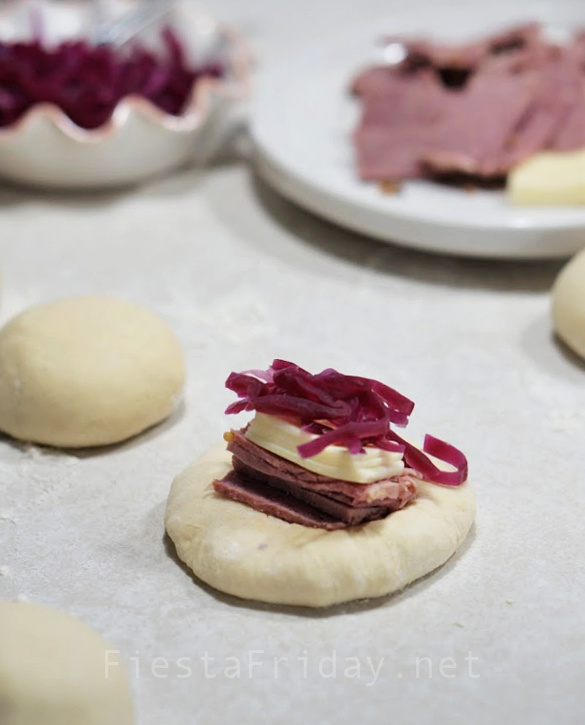
Now, if only I had planned this ahead of time, I would have added rye flour to the dough and then served the corned beef-stuffed bread with Russian dressing, to create a Stuffed Reuben Dutch Crunch! Shut the front door! Quick, buy more corned beef, and rye flour!
- 150 g (¾ cup) warm milk or water
- 300 g (2 ½ cups) bread or whole wheat flour
- 100 g (½ cup) sourdough starter (active and recently fed)
- 1 egg
- 3 g (½ teaspoon) salt
- 55g (¼ cup) softened butter
- 80 g (⅓ cup) warm water
- 64 g (½ cup) rice flour
- 13 g (1 tablespoon) brown sugar
- 3 g (1 teaspoon) dry active yeast
- 2 g (¼ teaspoon) salt
- 13 g (1 tablespoon) olive oil
- 4 g (1 teaspoon) sesame oil
- The night before baking, start making the bread dough. In the bowl of your stand mixer, add the warm milk/water, flour, sourdough starter, and egg.
- Using the dough attachment, start mixing and kneading the dough until the liquid is completely absorbed into the flour. The dough will look very sticky.
- Continue the kneading process, adding salt, and softened butter, one tablespoon at a time. At first, the butter may look like it wasn't going to mix, but eventually, it'll blend in with the dough, which should form into a glossy ball. This should take about 5 minutes or so.
- The dough will be sticky to the touch. You can add 1 - 2 tablespoons of flour if you feel that it's too sticky.
- Use a dough scraper to transfer the dough into a buttered bowl. Cover with a tight-fitting lid or plastic wrap and place in the fridge overnight. The dough will rise slowly, developing its sourdough flavor.
- The next day, when you're ready to bake, take the dough out. It should be close to double in size. You can work with it while it's still cold; it's less sticky that way. But you can also let it rest to come to room temperature before handling it.
- Scrape the dough onto a floured surface and divide into 10 equal portions. Roll them into balls. You can stuff them with the optional stuffing ideas. * See Notes
- Place balls on a baking sheet lined with Silpat or parchment. Cover and let them rise until they're nearly doubled in size, about 1 - 2 hours.
- Before you're ready to place them in the oven, make the topping paste by mixing all the ingredients together. Let it rest for several minutes to activate the yeast.
- Heat your oven to 400°F.
- Using a spoon or brush, "paint" each dough ball with the paste, spreading it all around (See photo in the post). Place in the oven, and bake for 20 minutes, or until the topping looks brown and crackly. Serve warm.
Thanks to Barbara (read comments below) for providing the weight measurements for the topping ingredients. So helpful!!
What’s the difference between rolls and buns?
If you think I had a hard time deciding between Gado Gado Rolls and Gado Gado Wraps, I had a harder time deciding whether to call these bread rolls or bread buns. What’s the difference, anyway? Does anybody know? In the end, I didn’t commit one way or another. They’re just bread, that’s what they ended up being.
Pin This To make Later – Follow me on Pinterest
If you like this recipe, please give it a ⭐⭐⭐⭐⭐ rating in the comments section below. Thanks!
Angie? I can almost smell the delicious aroma of this ‘Tiger!’ bread through my screen! We love tiger bread and you’ve reminded me to make it again. I’m going with ‘rolls’ as buns to me are individual cakes, or a sweetened iced dough as in iced buns! I love the stuffing idea too, great idea for school lunches! ??
Thanks, Laurena! I only recently started making this “Tiger” bread. I think I want all my bread Tigerized now 😀 How are you, btw? Is there another lockdown?
Angie I think we’ve been in lockdown here more or less for a whole year now! I certainly don’t remember doing anything of much since March 2020! Next phase of us emerging from this is 12th April – schools have only been back since 8th March so slowly slowly here! I’ve had my first covid jab now so things are looking up though! Oh, I wonder if you can ‘tigerize’ ready made bread? There’s an experiment for me! 😛
That’s tough to be in lockdown for so long. In New Jersey, we’re going to welcome back ALL students for in-person learning as soon as Spring Break is over. When we made the announcement, all the students (in class and on Webex) started cheering! Poor kids want to see their friends. Anyway, tigerizing ready made bread sounds like a brilliant idea. But you may not get the crackly effect since the bread has already expanded?? Experiment nonetheless, I’ll be interested to find out how it goes.
I have never seen this type of bread before. They really look crunchy and delicious.
Thanks! Dutch Crunch Bread is crunchy on the outside and soft inside, but my sourdough version has a slight chew, which I love.
This is my personal favorite from last week’s Funtastic Friday, also pinned to the FF board! Thanks for sharing great such great content! Melynda@ScratchMadeFood!
Thanks so much, Melynda! I’m so glad you like it. XO
Thank you for this recipe! I will be trying it in a week or two, right now I have enough sourdough sandwich buns in the freezer to last that long. I grew up in So. California and my Mom bought Dutch Crunch rolls at the local German deli. I might stick to my bun recipe and just try the topping on some of them. I bake 18 every few weeks for my husband’s lunch. Normally I use a bun pan to make them, but I would have to try a sheet pan.
You’re very welcome. These buns were so, so good! Especially when they were fresh and hot from the oven. We just tore them apart, smeared butter, and went to town on them ? Let me know how they turn out for you.
I finally made the rolls using your recipe yesterday! They were yummy and crispy. Reminded me of those I had as a kid. I did skip the refrigeration step, because they didn’t need to be sour tasting. I fed the starter the night before in a small amount, which I learned from another website and it really made a very robust starter. I divided the 100g into 30g starter, 35g potato water, and 35g King Arthur AP flour. Stirred it all together, covered and put it in my oven with the light on overnight. It was bubbly and doubled! Also, I had to add an extra 100g flour, because the dough was extremely liquidy and sticky, no matter how long I kneaded it in the machine. However bottom line is that the dough was very active, almost as if it had dry yeast in it, which it didn’t! Also I do stretch and folds during the fermentation process. The topping was perfect! Will be making them again this week, because I had topping leftover and saw on another site, you can keep it for a few days if you have leftovers!
So glad you enjoyed the rolls, Barbara! With regard to the sticky dough, you did the right thing by adding more flour to your liking. Less sticky dough IS easier to work with! Thanks for the tip about the topping leftover, I did not know that. And thanks for giving this recipe a 5-star review ?
Can these be cooked in an Air fryer?
I’ve never tried it but I don’t see why they can’t. If you’re used to baking your bread in an air fryer, I’m sure you can manage to do the same to these rolls/buns. Give it a try and let us know how they turn out.
Hi, This looks lovely and tempting. I have recently started on my sourdough journey. As soon I saw this post I wanted to try out the recipe. The only problem is use of egg. Is there a substitute for that? Would be so grateful if thats possible.
Thanks, Tanu! Unfortunately, I haven’t experimented with egg substitutes, but I would think it’d be okay to omit the egg and add 2/3 tablespoons of water or milk instead. Bear in mind, the taste and/or crumb of the bread might differ, but give it a try and let me know!
Looks great; I’ll have to give this a try.
Just wondering: why not give ingredient weights for the topping when you did so for the dough?
I was being lazy, ha! But I promise next time I make this again, I will also weigh the topping ingredients and amend the recipe. Thanks for the feedback!
I think there’s a mistake in this recipe, there’s no bulk rise before refrigeration. I thought it was odd but I’m no bread expert so I decided to just follow as written. After nearly 24 hours in the fridge it didn’t rise or change shape or pattern at all. So it’s currently coming to room temp on the counter and hopefully I’ll have time to shape, do second rise, and bake before I have to leave the house. Frustrating but hopefully the recipe can be fixed so this isn’t an issue for others.
Oh gosh, that is indeed frustrating. But you did read the recipe correctly – the dough does not need to be proofed prior to refrigeration, the proofing is done very slowly in the refrigerator. Having said that, you can always let the dough proof at room temperature and it should rise quicker. Bear in mind that sourdough starter doesn’t behave like regular yeast. It rises slower and it also depends on the strength of the starter. If you use an actively bubbling starter, there should be a pretty significant rise even in the fridge. Mine didn’t completely double, but nearly. I hope you managed to salvage the dough, please let me know!
My starter is mature and was very active but no signs of activity after 24 hours in the fridge. Perhaps my fridge is particularly cold. But I left it on the counter for a few hours, then shaped and left for another couple hours. It baked up great! It was probably the softest crumb I’ve had with an enriched dough – every other roll recipe I’ve made has turned out too dense for my liking. And the crunch was really nice! Next time I will mix the dough in the morning, bulk proof on the counter, then refrigerate for a few hours for the extra ferment and so I can shape cold, as the room temperature dough was very sticky. Definitely making it again!
I’m so glad everything turns out alright, Jennifer! Thanks for letting me know, and yes, the dough will be less sticky and easier to handle when it’s cold.
Here are my topping ingredients weighed out in grams. That is how I do all my baking. I found that using cups and spoons never gave me the right dough, until I switched to weight. Hope this is close!
80 g (⅓ cup) warm water
64 g (½ cup) rice flour
13 g (1 tb.) brown sugar
3 g (1 tsp.) dry active yeast
2 g (¼ tsp.) salt
13 g (1 tb.) olive oil
4 g (1 tsp.) sesame oil
Oh, this is great! It’ll be so helpful to add these measurements to the recipe so I’ll do just that. Thanks a bunch, Barbara!! XO
Wow these look trully crunchy, I wonder if you can make them with whole wheat flour?
I’m pretty sure you can! The texture of the bread might be denser with whole wheat, but that’s not to say it won’t be good.
Your recipe for Dutch Crunch Sourdough Bread Stuffed with flavorful ingredients is a true culinary delight. The step-by-step instructions and the mouthwatering photos accompanying the post make it easy for even a novice like me to imagine attempting such a delightful creation.
Thanks so much for the lovely comment XO
I also had the problem that it didn’t rise in the fridge at all. My fridge is at 38 degrees Fahrenheit and my starter is very active, it had more than doubled and had bubbles throughout. The starter is several years old and I fed it twice per day for 3-4 days so it was very active. I’ve had other doughs rise in the fridge for their 2nd proof so I’m not sure what happened here. Maybe due to the butter? I used 2% milk instead of water. I’m hoping the dough will rise this morning in a warm place. I don’t know what happened, I’m an experienced bread baker.
Hmm… I hope everything turned out alright. Let us know, please.
Has anyone ever tried stuffing with fruit, sour cherries for example?
I haven’t tried it but that’s a wonderful idea. I might give it a try one of these days.
Hello, how do you stuff these? Do you just wrap it around, or put two pieces together? Thank you, these look delicious!
Either method will work, but I usually flatten a piece of dough, place the filling in the center, and then pull the dough up around the filling, pinching the edges securely. I hope this helps!
Hi! Have you tried freezing these before baking them? Or freeze them after baking them? I’d like to make them for a party, but I have a lot of other things to make as well.
I haven’t tried freezing these but I’ve frozen other kinds of bread successfully so I’m confident that you can freeze these as well.
Can I substitute something else in place of the yeast for the topping?
The yeast is added here to lighten the rice flour “paste” so it doesn’t create a dense and hard crust. I’m guessing you may be able to get similar results with baking powder, though I’ve never tried it. Let us know if you decide to give it a go.
They’re delicious and beautiful but I don’t know how you get them that dark must have a special oven I would love to know your secret
There are no secrets, but not all ovens are alike. I know it’s cliche to say, but it’s the truth. I have a convection oven, but don’t always turn on the convection setting, and can’t remember if I did or not. You can adjust the baking period if you want a darker crust. Good luck, Kay, and thanks for the comment.
I am planning on making these again. However, this time I want to make them smaller, more like dinner roll size, so instead of 8, 12?
That’s definitely doable, Barbara, and they would look cute. I recently came back from the UK, and over there, these rolls are more common. They are available in many sizes in most grocery stores, so convenient!
I made them, but allowed them to rise too long for the final rise. They flattened out. I will be trying it again. I think my oven is too hot because they got too dark. They taste fine, otherwise.
Bummer! I’m glad they were still enjoyable!