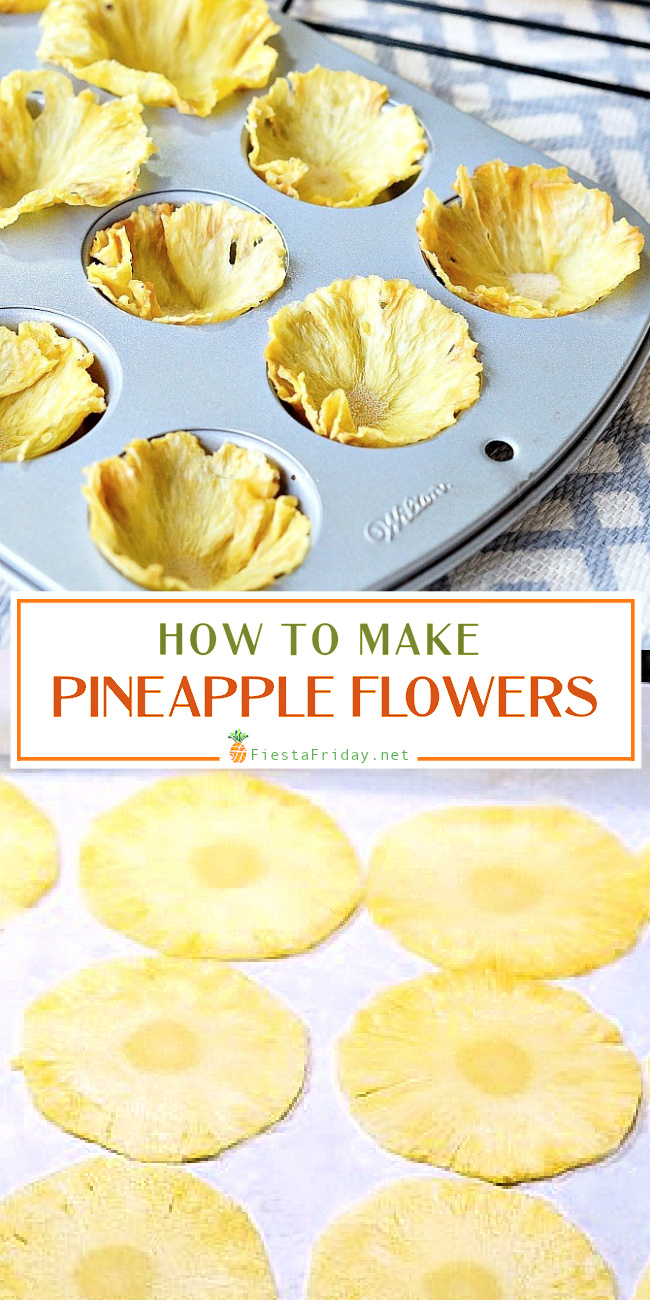
Step-by-step instructions on how to make dried pineapple flowers. Edible and healthy decoration for your cakes or cupcakes!
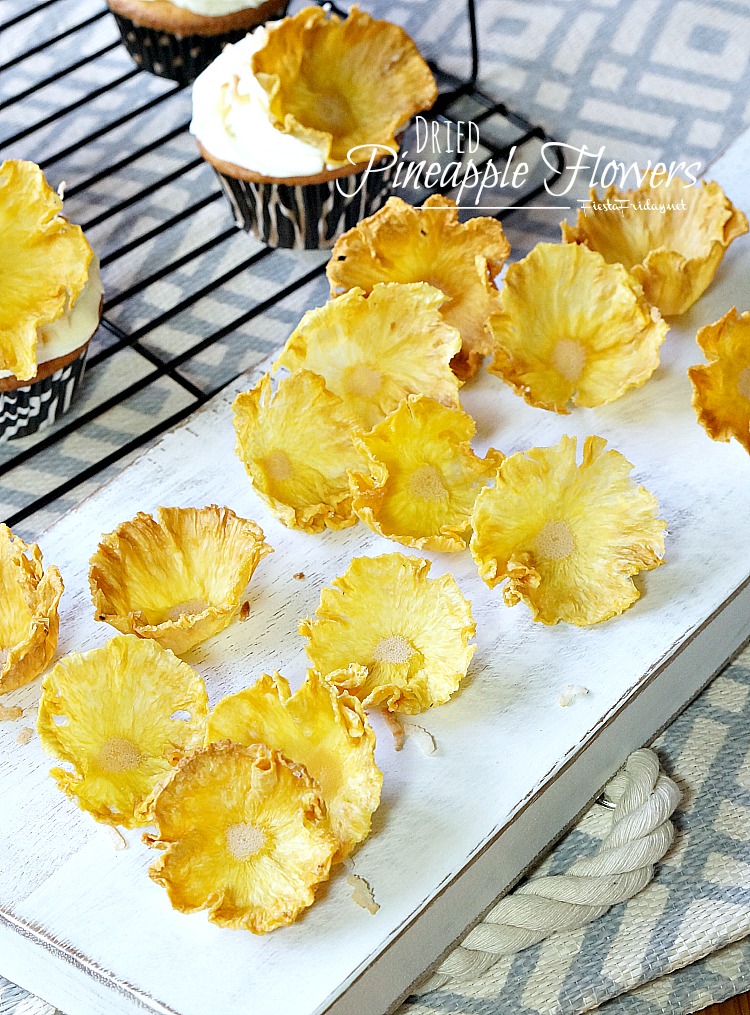
Here are the promised step-by-step instructions on how to make those pretty and edible dried pineapple flowers. You can use them to decorate your cakes or cupcakes or just eat them as a snack. They are delicious and better for you than those fruit candies you get from the stores. And guess what? These dried pineapple flowers do taste like candies!
I first saw these oh…must have been a couple of years ago, in Martha Stewart’s Cupcakes Book. Oh…I didn’t buy it, I just flipped through it at Barnes and Noble’s. And since I have a photographic memory, I was able to recreate them at home, without having to buy the book!
Okay, I really just went on her website to find the instructions when I came home. For some reason the original recipe is no longer there today, but I was able to find this page on MarthaStewart.com to show you that it was there at one point.
In the recipe, she mentioned that after you peel the pineapple, you then need to “gouge” each of the pineapple eyes with a small melon baller or the tip of a paring knife. I can tell you that this instruction has been repeated by many, many other sites.
Seriously, people? Martha? Please, whatever you do, don’t do this! Don’t listen to Martha! Oh…don’t worry, she won’t be mad at me for saying that. Martha and I know each other very well. I mean, Martha and I are old friends. I mean, I’ve been obsessed with Martha. I mean, I’ve been a faithful follower since I was in high school.
I believe she would appreciate an improvement to her recipe. She is a pretty cool person. Have you seen her roasting a turkey? I mean, Justin Bieber? The woman is not only a genius in the kitchen, she is obviously also a comedic genius! Y’all have to watch the video!
Anyway, don’t spend precious time gouging those pineapple eyes one by one! There’s a much easier way to get rid of the eyes. Plus, I feel that gouging the eyes, thus making all those little holes on the pineapple, just ruined the overall look of the final product. You want these flowers to have uniform “petals”. I think I have a better way of making these dried pineapple flowers.
I first wrote about these pineapple flowers in my older blog The Novice Gardener, but I didn’t provide step-by-step photo instructions. So, here they are:
How To Make Dried Pineapple Flowers
1. Slice the top and bottom of the pineapple, so it can stand up on your cutting board.
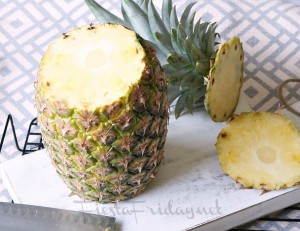
2. Then slice off the rind of the pineapple from the top to the bottom, exposing all those eyes.
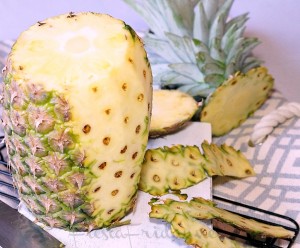
3. If you decide to peel the pineapple this way, then this is how you should get rid of the eyes.
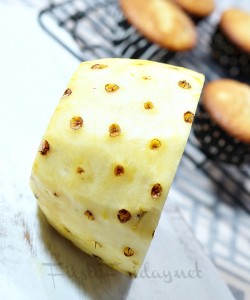
Do you see how those eyes are lined up diagonally on the fruit, but pretty much in a straight row? Using a paring knife, make v-shaped cuts all along the rows of eyes, removing multiple eyes at once.
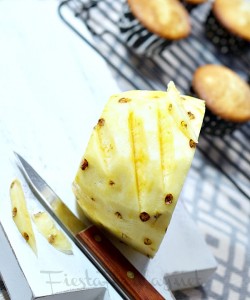
4. But the easiest way, in my opinion, is to peel the pineapple thickly, removing all the eyes at once, along with the rind.
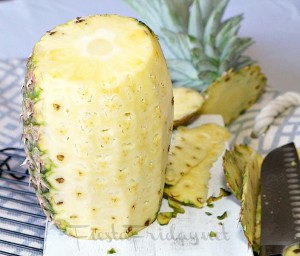
I think you get the best-looking flowers this way. And you can always save the scraps for other uses so you don’t feel like you’re wasting on the good pineapple.
5. Once your pineapple has been peeled to your satisfaction, start slicing it thinly. It doesn’t have to be paper-thin, but try to get even slices.
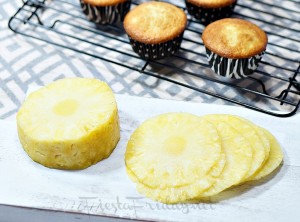
6. Now you have a choice. Either dry these slices in a conventional oven or dry them in a dehydrator. I prefer the simpler, fool-proof method of using a dehydrator and have always gotten great result from it.
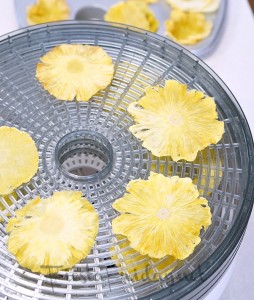
A dehydrator heats and dries these slices gently and as a result, you will get a more uniform color without any browning or scorching. You just leave them in the dehydrator for about 5 hours, then flip them once, and continue drying for about 5 more hours. The flipping may not even be necessary. One time I left my dehydrator on overnight, didn’t flip the slices, and I still got a good result. Some pieces were a little too crisp to form but otherwise the color was perfect.
7. If you don’t have a dehydrator and prefer to use a conventional oven, however, then place the pineapple on a baking sheet that has been lined with parchment paper or silpat, and bake in 200°F oven for anywhere between 45 minutes – 1 hour, turn over the slices, and bake for another 45 minutes – 1 hour.
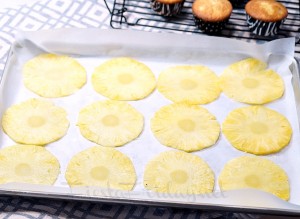
All the times mentioned above are approximate. Your dehydrator and oven may act differently from mine or your slices may be thinner or thicker than mine. But what you’re looking for at the end of the heating/drying time are slices that are dry enough that you can start shaping them, but not crunchy dry. They should still be warm and pliable.
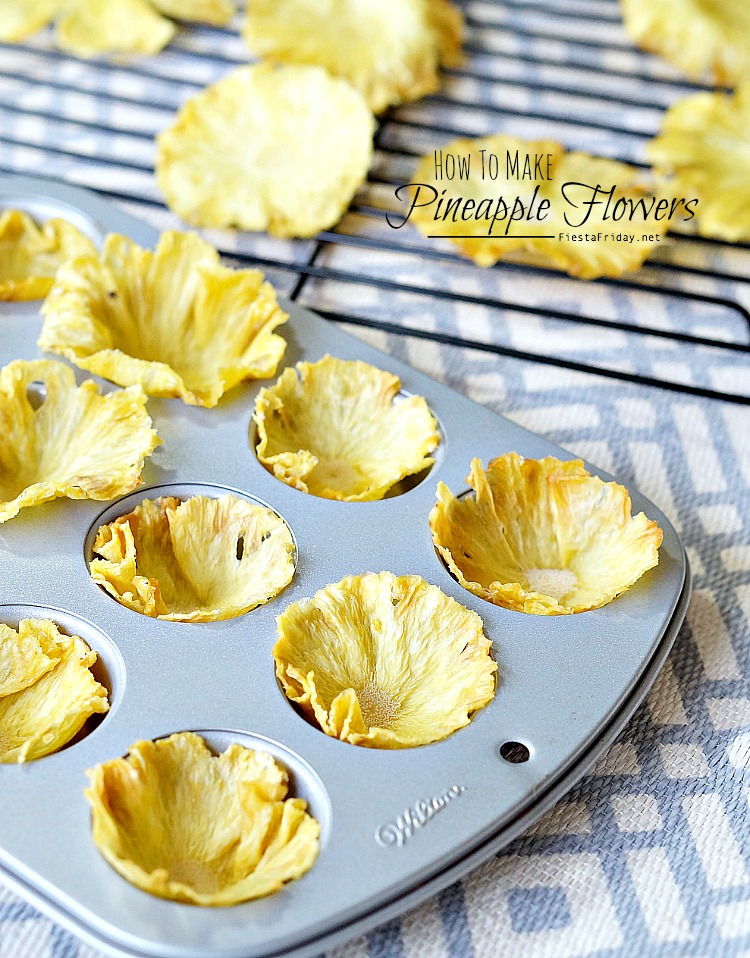
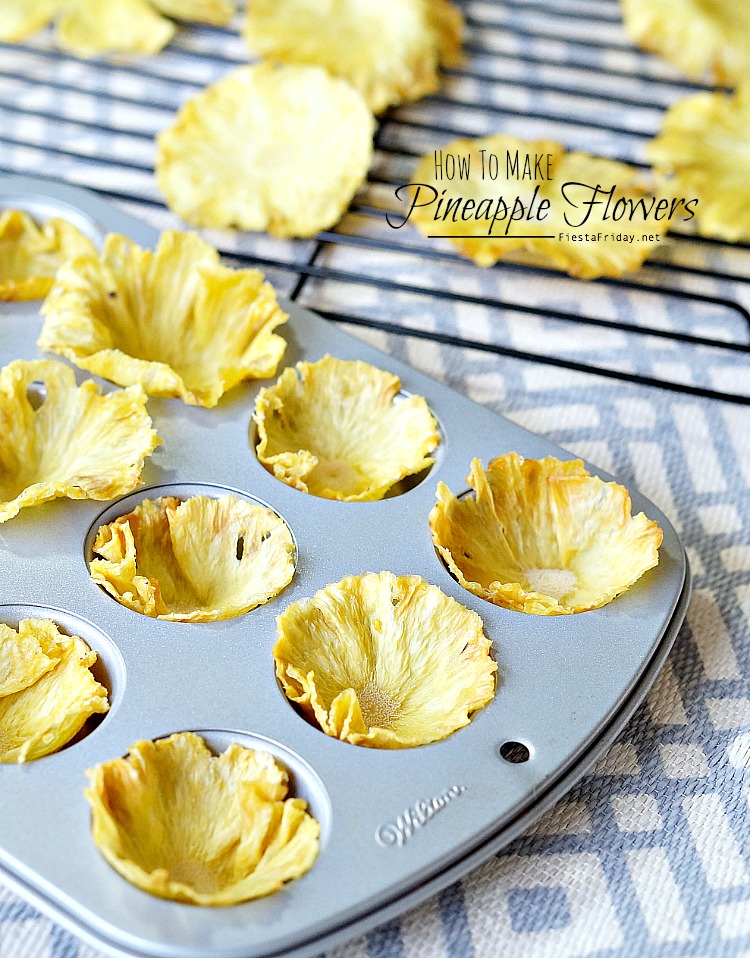
8. The easiest way to form them into flowers is to place them in a muffin pan so that the edges curve up to form a cup. You can also pinch the center of the slices so they will curl up. Leave them overnight until they hold their shape.
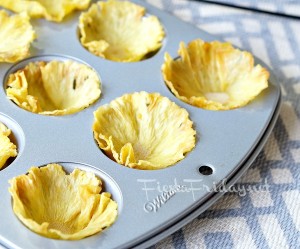
P.S. This does not work well with pineapples you get from the store that have been cored. You want the center/core of the pineapples intact. It’s what gives the flowers their distinctive look.
I love this! It is so pretty and I can’t wait to make them! brilliant 🙂
I’ve made them numerous times by now. My daughter loves them so much! She brings them to school for her snack. Isn’t that awesome?
that is a great snack! and it looks gorgeous! Am feeling inspired! 🙂
You can also stack them up to make multi-petaled flowers! 🙂
Love that idea. I am going to do this just for a pineapple snack.
Thank you for the detailed step by steps Angie! I’m with you on cutting the sides more deeply to get rid of those eyes! Love Martha…i really learned how to cook from her. Love these flowers!
So glad you like them, Johanne! I hope you’ll give them a try. They’re so easy to make! Many people deride Martha Stewart, but she has many good ideas! Or at least she has creative people working for her! 🙂
Martha Stewart was the first person that I saw do this.
Thank you Angie!! The flowers look beautiful and will definitely try to make them with your lovely instructions! 🙂
They’re so easy to make and they’re healthy! What’s not to like, right? 🙂 Thanks for checking them out, Lili!
Exactly, it’s great how healthier is often easier too! You’re welcome and thank you again Angie for the flowers!!! 🙂
🙂
This is neat! It looks so beautiful just like cute flowers! Very Summery and cheerful! Love your elaborate instructions and tips to get it right.
Thanks, Sridevi! I hope you’ll give them a try since they’re so easy to make! 🙂
Ah, I love to try such colourful ideas! 🙂
🙂
wow very beautiful 😉
Thank you so much, Chahat! Thanks for stopping by and leaving me a comment. Have we met? 🙂
So beautiful. We shop at local veggie markets. I can shock my husband by asking him to bring home a pineapple next time they’re in season.
Pineapples are available year round in the US since they grow in Hawaii and Puerto Rico. Lucky us, right? I’ve had white pineapples from Hawaii that taste like sugar! They’re called Sugar Loaf! Thanks, Mermaid! I hope you’ll give them a try. 🙂
Gorgeous!! My mom knows what a Martha fan I am- so she teases me by calling me “Marty” when I make something like this (mine is usually a couple notches less fabulous though…). I’ll have to show her who the “real” Marty is!! My daughter would love to bring these as a show-off snack to school! 🙂
That makes the two of us! I find her quite hilarious at times, in a good way! Like she irons her scarves. Also her bed linens, lol! My daughter’s friends now beg her to bring more of these! I’m actually thinking of making a batch of dried fruit flowers, using different fruits. Would be interesting to see what will work. Maybe melons and peaches?
I have some sheets that need to be ironed… that’s when I let go of the “Martha” in me!! 😉
LOL! Confession time, I did iron my sheets before I had kids!! I still iron my tablecloths! 😀
I KNEW you were the real “Marty”! 🙂
🙂
I would love to see that with different fruit.
That’s an interesting idea. Pineapple does lend itself well for this purpose because of the size and the fact that it doesn’t contain a pit in the middle, just a core.
I was convinced that the “yellow flowers” on your previous blog were simple flowers, maybe from your garden…. now I learn that they are actually tiny slices of pineapple! That’s amazing Angie…. I would like to decorate all my dishes (and maybe my table as well) with these beauties….. Thanks a lot for revealing us “your secret”!
Did you really think it was real flower? 🙂 Actually, you’re not the first to think that! But, yes, these are made of pineapples. Aren’t they something? I hope you will give them a try, Margy! Really were easy to make, especially if you own a dehydrator. 🙂
Yes! I’m not joking! I was convinced….. what a good news you gave me! I do not have a dehydrator, I will try on the convention oven…. but I have to try them out!
I made some in the oven, too. Those that are slightly brown are oven-dried. Just make sure you check on them often when you use the oven. Let me know how they turn out, Margy! They taste great!
Love it!!! This is such a great idea! And seems easy to make… Thanks for sharing
Yup, so easy to make, Olga! I hope you’ll give them a try! I hope to see you tomorrow at FF63! 🙂
These are so pretty! I clean my pineapple just like your later picture. Rind and eyes in one swoop with the nike. See you tomorrow!
Thanks, Julie! That’s the best way, IMO! You should see Martha Stewart’s recipe, if you can get to it (it’s gone now somehow but there are pictures), that tells you to de-eye one at a time! And lots of people actually did! See you tomorrow! 🙂
Thanks Angie!
These are awesome! Thanks for the step by step directions. I love the simple,yet beautifully decorative nature of these pineapple flowers. They’re a perfect dessert topper. See you at Fiesta Friday soon! 🙂
They really are the perfect dessert topper! Pretty but easy to make, and healthy, too! Thanks, Kaila! See you soon at FF63!
How brilliant Angie, you come up with the neatest ideas sans Martha Stewart :)). I too cut the pineapple thickly so as to avoid the “eyes”. But I do have one question, the core of the pineapple, you know the middle part? Well, we never ate that as it got your mouth and tongue all “scratchy like”. Does baking or dehydrating get rid of that I wonder? Just thinking out loud here, but they are absolutely gorgeous!
I’m so glad you asked, Loretta! I was going to talk about the core in the post, but I thought it was getting too long! Whatever you do, do not get rid of the core when making these flowers. I made a mistake of using a pineapple that’s been cored, and my flowers all had holes in the middle. Not pretty at all! But I ate all the little dried up core pieces, and guess what? No itchy throat! I may have discovered a way to save the core. Dehydrate them! And they actually tasted good! 🙂
OK thanks Angie, perhaps the dehydrator helped get rid of that itchy throat feeling 🙂
Absolutely amazing!!!! You amaze me x
Aaw, Elaine…you’re just too sweet! The things you do to vegetables amaze me!!
🙂 x
They are so lovely, Angie. Thanks for sharing!
Thanks, Rena! I hope you’ll give them a try! 🙂
They really are SO very beautiful Angie! I will definitely get around to trying them one day! M.xx
Thanks, Margot! They really are very easy to make. I hope you’ll give them a try! XOXO
Angie,
Those flowers are stunning! And without having to ‘gouge any eyes’ 🙂 Thank you for the step by step.
I know, right? Quite sadistic!
can i color them wht will b result
Were you thinking of adding food dyes to the pineapple slices? I’m pretty sure you can, but I’ve never tried it.
Simply amazing!
Thanks! 🙂
These are really pretty so how do you store them, and what is the shelf life after you make the flowers.
You can just store them in a tupperware. In my experience they lasted for at least a couple of weeks, but could possibly last longer in an airtight container.
Just wondered if it matters how ripe the pineapple is? I would be making them in the oven and wondered if you could place them on the cupcake tin upside down so that when they dry out they would begin to drape down over the cup and form the flower. Thanks for the tutorial!
I suppose a very ripe/juicy pineapple will need extra time to dry. Re: draping over cupcake tin, it might be unnecessary. The slices need to be flipped over at least once for even drying, especially if you use conventional oven. When they’re ready to be formed, they need to still be pliable and not hardened. Having said that, these are guidelines, certainly not set in stone. Give your plan a try and see what will happen. I’d be interested to know if it works out. Will save me extra steps next time. Thanks for checking out the tutorial! ??
Can I use canned pineapple?
I haven’t tried it and I wouldn’t recommend it. Canned pineapple is a lot “wetter” and most likely soaked in some kind of syrup, which may burn in the drying process. Plus the core would have been removed, so your flowers wouldn’t have any centers.
What temperature do I set my dehydrater for and how long?
My dehydrator doesn’t come with temperature settings, only a knob that you can click to either low or high. I did it on low. I would guess that would be about 140 deg Fahrenheit. Hope that helps!
Thanks. I was so disappointed when my pineapple flowers turned out brown in the oven, so I purchased a dehydrater just to make more. Carol
Oh, I’m so sorry to hear. Dehydrating in the oven can be unpredictable since all ovens are not the same, and there are often hot spots that you can’t control. A dehydrator offers gentle heat more suitable for this project. Hope everything works out this time.
Woow. So cool.
May i know brand you use for dehydrator?
Do you need to poach them in sugar liquid to make it translucent?
My dehydrator looks a lot like the Elite 5-tray. If you google it, you’ll be able to see what it looks like. And no, you don’t need to poach beforehand, but why not experiment to see what would happen if you try that ?
This is brilliant! Such a pretty way to serve desserts!
Thanks, Kelly! ?
Hi Angie,
Thanks for the tutorial.
What would be the best way to store these long term?
Cheers,
Kristy
You can try putting them in an airtight container or maybe freeze them, but from my experience they tend to get a little limp after a few days, with a texture similar to dried apricots. They didn’t stay crisp. They were still tasty, though.
Hello, the pineapple flowers looks beautiful
I do not see a picture of how you “pinch” the core to make an cup effect.
Could you lease explain hat a bit more in detail? Thank ypu
When the pineapple slices are dry (but still pliable), pick them up by the center/core with your fingers, pinching as you pick. The edges will automatically curl in, forming a cup or flower.